
The bare necessities for the Backcountry
Being prepared with the right materials and equipment for a day out in the backcountry is as much of an essential as the snow you need for the ride down. Still, too often we spot freeriders riding off-piste without any safety equipment which makes you wonder if they're aware of the risks they are taking, and just how devastating one mistake can be. It's all well and good if you yourself are completely equipment prepared for a day of freeriding, but what if your buddies have little to no equipment? When shit hits the fan and you're the one in trouble.. just how will your to little equipped crew help you in a life or death situation? Ultimately we all want to ride the best lines and have an amazing day, but a little prior planning will create amazing memories without any fatal consequences resulting in some very happy mothers/girfriends/boyfriends or even dogs when we arrive home. To boost awareness within the freeride community, we have created a little blog as a guideline for preparing backpacks, safety equipment and more...

Backpacks
There are hundreds of different backpacks varying in size, shape and volume. And it's pretty easy to get lost within this huge range of offerings! start by highlighting the main use for your backpack.. Purely for off-piste and freeride days;- a backpack with a volume range of between 18-25 Liters is enough to fit safety equipment and additional goods (food, a little dutch courage or a change of clothes).
If you're planning more than one day on your Splitboard, a volume range of 28-40 Liters is recommended for the additional equipment needed, along with food, drink and other essentials for overnight stays.
There are also other variations of mounting options available for the outside of the Backpack;- either for your Snowboard, Touring-Poles, Ice Axe, Helmet and so on.
To increase the safety aspect, there is also a back protection integrated into the backpack, which helps to protect your spine from hard impacts.


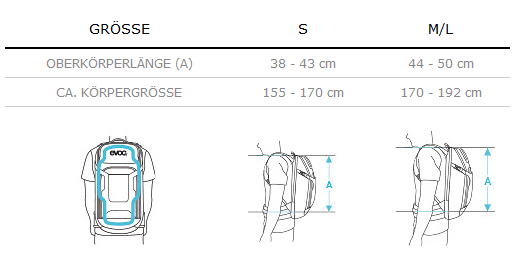
Size matters
Size certainly does matter when buying your backpack, it's essential that the backpack ratio fits to the length of your upper body, this is measured from the shoulders down to your waist. If the fit is not correct it will make for an uncomfortable days riding leaving you feeling pretty achey. A well fitted backpack will ensure that the weight is distributed evenly through the use of a correctly fitting waist strap, which may be too high or low when measured incorrectly.
good to know!

To keep things quick and easy in the event of an emergency, it is best when the backpack includes a separate pocket or section with zipper access to store your shovel and probe.
This means you avoid waisting valuable time rummaging through your belongings.. lunchbox, thermos and change of clothes just to get to the all important safety equipment.
Safety Equipment
Depending on how you're spending your day riding, the packing list for a freerider can differ to that of someone going touring (just slightly).
Standard in every backpack when leaving a secure area should be your BEACON, SHOVEL, PROBE, FIRST AID and MOBILE PHONE, all of these devices should be checked before to make sure they're charged and functioning correctly.


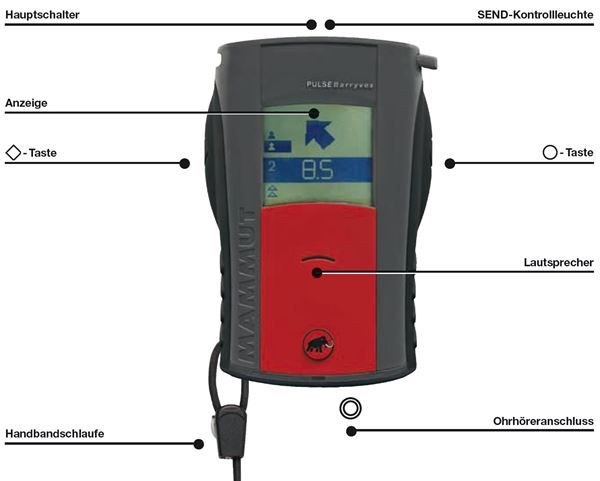
Transceiver/BEACON
As a winter outdoor enthusiast, you must consider all possible avalanche prevention measures and plan your trips carefully.
A companion rescue (your riding buddies saving your ass) – the worst case scenario – has to be practiced frequently. Under the stress of an accident, this is the only way you will be able to locate and dig anyone out quickly and efficiently. The companion rescue is your best shot of survival when buried.
To use and work with a 3 antenna model with digital display, reduces the time and effort making your search easier and quicker. It is important that all of your riding buddies are using a model with 3 antennas, digital display and operating on the new EN standard of 457kHz.
With the Multiple buried people function the transceiver attempts to analyse all detectable signals to determine the number of casualties buried. The device will always highlight the closest signal first.
Auto-revert to SEND; automatically switches the transceiver from the SEARCH mode to the SEND mode if no user interaction or movement occurs during a certain amount of time. Incase rescuers are buried in a second avalanche, this function allows them to be located using transceivers.
Only use Alkaline batteries, and always use 3 new batteries of the same type.
Never use rechargeable batteries and always replace all batteries at the same time. If the battery level on the display shows 40%, this is time to change them!
Having your mobile phone close by is very important, however it's also important to know that your mobile phone is a huge distraction for your transceiver and should never be stored near each other. Switch your phone to flight mode or store it in your backpack after calling for help.
Probe Pole


Pinpointing the location of a buried person is not possible with the transceiver alone. The burial depth and the orientation of the person can be determined with a probe pole. Starting at the point with the lowest distance reading, apply a spiral search pattern. Always probe at a right angle to the snow surface. If the buried subject is hit with the probe pole, the pole is left in the snow. It serves as a guide whilst digging to reach the buried casualty.
The burial depth is also of importance as it is required to start 1,5 x lower than the victim is buried.
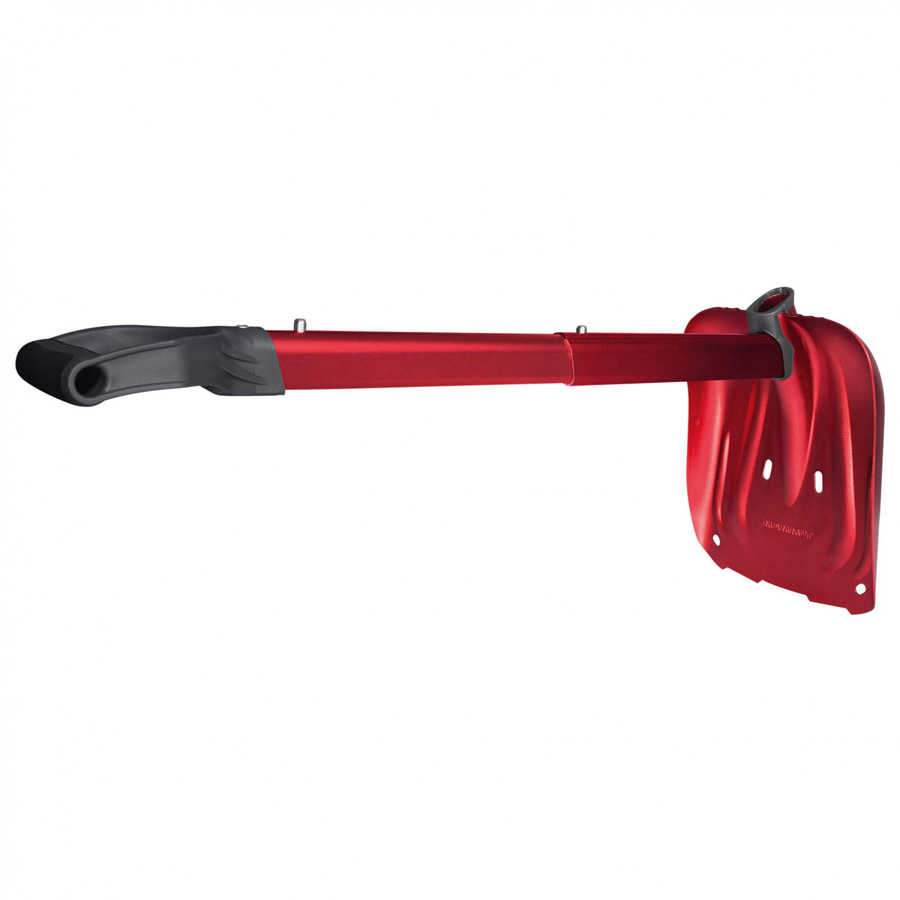
Shovel
For the SHOVEL it is essential to buy a Aluminium one. Avalanches can get as hard as concrete and a plastic shovel would be of no use at all. Another useful item is a Telescope shaft and a durable blade, changing from shovel to hoe function. Size the area to be dug out generously and avoid trampling on top of the buried person. The lead shoveler of the group should be swapped around from time to time. Rotating clockwise at given intervals is easiest. Digging is strenuous, so its good to be practiced or have good physical fitness as this takes the most time and is harder than most people would think.


First Aid Kit


Your first aid kit should be prepared for all possible injuries that could occur on freeride or touring days;
Israeli pressure bandage; to nurse cutting wounds with strong bleeding.
Sam Splint; to support a bone fracture on arms, legs, shoulders, fingers and the neck to reduce the pain.
Rescue blanket; to prevent hypothermia incase of unconsciousness or injuries.
Scissors, plasters, sterile compresses, ventilator-cloth, bandages, triangle sling etc.
Phone
In case of an emergency you need to be able to call for help, this makes your phone a vital part of equipment. There are some really handy apps for your MOBILE PHONE to keep you updated on the avalanche reports and help you save time in case of an emergency.
It is also possible to download the section of any map you need and use it later in the offline mode. This can be used for orientation and location.
Example's of apps:
- Lawine Tirol
- Notfall Tirol
- Outdooractive
Additional equipment
Avalanche Airbag system (abs)

On the additional equipment side there are several things you can add to your list to enhance your safety while riding. An avalanche airbag system (ABS) increases your chance of staying on the surface during an avalanche. However, an avalanche airbag does not provide any guarantee of survival as its effectiveness in the avalanche depends to a great extent on the volume of snow, the density of the snow and, in particular the nature of the terrain. To put on the avalanche airbag correctly, thread the hip belt through the leg strap; close the hip belt (the hip belt should sit on your hip bone); Tighten the shoulder and chest strap, the length of the leg loop can also be adjusted and should fit tightly. It is important to ensure that any additional equipment does not disrupt the deployment of the airbag. In other words, do not block the airbag opening.
Helmet
Snowboarding is an extreme sport no matter if you are on piste or in the backcountry. A Helmet protects your head from hard impacts and rock- or icefalls and is always a smart thing to have.
Biwak Bag


A two man Biwak Bag should always be part of your touring packing list. Make sure you purchase a solid bag with metal holes along the side as it can be a life saver and used for many things:
- To keep you and the injured person warm inside the bag protected from wind and cold temperatures.
- Build a snow shelter and use the Biwak Bag as a roof.
- Put 2 Probes on the left and right alongside the bag through the metal holes, roll the material around the probes length ways a couple of times and use it as a stretcher to transport the injured person to the next safe place.
- or build a ''Biwak sack sledge'' and transport the injured person along the snow surface.
The last 2 points require 3-6 people!
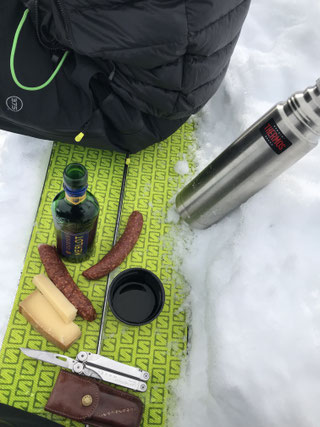
Food/Drink
Dehydrated and hungry are two thing you don't want to be on a mountain, it can make you vulnerable in more ways than one. Dehydration happens quicker than you would think, even if its f***ing cold.
The best way to prevent this from happening is to stop for regular drinking breaks and/or have a drink even though you're not particularly thirsty. If you feel thirsty you are already starting to become dehydrated. Extreme dehydration can lead to mind-confusion and make you more prone to accidents. A hot drink in a Thermos flask is the best way to stay hydrated, if you for some reason get cold it will also warm you up.
There is nothing better than eating your lunch on a cold and windy mountain peak after an awful long hike. At this point even the simplest of foods will taste like a gourmet meal, it is also important that you keep eating during a hike such things as small quick sugars e.g. muesli bars, apples, bananas etc. Once you reach the top this is the best time to enjoy something proper to, and even better would be to have something warm. The Perfect product for storing warm foods on hikes is a Thermos Food Container.
''Should have's'' in you backpack
Beside those ''must have's'' there are several other things which should be in your Backpack to make it a safe and unforgettable tour. Here are our recommendations for the should have's to fill up the space left in your Bag...
- Crampons; for the splitboard, they are not necessarily a must have but consider this.. Just because a skier is traversing without crampons doesn't mean that you as a splitboarder will also be fine without. In fact you might need them earlier and therefore it's better to set them up sooner rather than later so not to find yourself in a dangerous situation.
- Thermos; is important for storing hot drinks to keep your body hydrated, as well as storing warm energising food for a tour/freeride day.
- Sun cream; to protect your skin from sunburn and cold winds. The snow reflects and intensifies the solar radiation, so it can be like sunbathing in the Bahamas.. but stronger.
- Shades/Googles; for the hike up and the ride down. The solar radiation can also do some damage to your eyes. So keep them protected throughout your hike and ride, you will need them for Snowboarding.
- Thin &Thick Gloves; for the ascent and descent. Always make sure you have a spare pair of gloves; a thin pair are perfect for hiking up and working on your splitboard, and thicker gloves are great for the ride down. Cheap thin hiking gloves can be found in a DIY-Store and are perfect for the job.
- Bandana or Beanie; depending on what you prefer style and comfort wise, as well as the temperatures and weather.
- GPS; (A Global Positioning System) is quite helpful if you're in an unknown or new area. It is best to avoid a GPS with touchscreen as it does not work with gloves or when the screen is wet. A GPS is used as a backup and is helpful if you know how to operate it.
- Topographical Map; from the area you are riding. The scale should be 1:25.000 as the details on it are much more precise.
- Power station; for mobile phones especially if you own an iPhone, since they do not like the cold temperatures.
- Velcro Straps; to attached to the highback on the binding and then wrapped around your boot, this will give you extra edge grip whilst traversing.
- Gaffer Tape; to be wrapped around your touring pole to fix skins or binding issues along the way. If you are out freeriding without poles then it can be wrapped around the telescope shaft of the shovel.
- Tool; to tighten screws on the bindings or board and anything else that might have become loose. We would recommend the 'Spark R&D' tool as it is light, small and has all the tools you need.
- Knife; such as a little red Swiss knife.
- Cable ties; such as the reusable kind can be great for fixing parts on your bindings like straps or buckles.


After all that information of what to back and what to use, there is one more important thing to say; All the best equipment in the World is useless if you don't know how to use it!!
L&P
Markus
Kommentar schreiben
adawd (Samstag, 03 März 2018 10:31)
www.ballparkrides.com